Search This Blog

Wednesday, December 10, 2014

December Entry - Wrap up 2014 Handmade Christmas Challenge

In January I took a pledge to make handmade gifts and decorations for Christmas in response to Sew Cal Gal's Handmade Christmas Challenge.

 It's been a fun and rewarding Challenge. Just look at all the stuff I have made for Christmas; so far, a total of 29 individual items. (Many months I made more than one of whatever item I was making.)
Small items for Challenge.
Note the quilt hanging on the wall. It was part of the Challenge, too.

Here's a quick month-by-month recap.

For January, I made a microwave bowl pot holder. 

For February, I made a drawstring gift bag.
  
For May, I made the table runner.

In June, I chose to make some mini-wallets to hold gift cards.

In July I made little birdie pincushions. Cute!

September was a busy month, but I managed to fit in some homemade stilettos.

In October, I used the red and white quilt I designed and made, "Holiday Happiness", for my entry.

Finally, in November, I made placemats using a fun.crazy quilt piecing as an accent.

Now that it's December, I have very little time to make anything. I am so glad I took the Sew Cal Gal Handmade Christmas Challenge! Do check it out. There are so many beautiful things people have made. And thank you for the challenge, Sew Cal Gal!

Tuesday, November 25, 2014

November Entry - Sew Cal Gal's Handmade Christmas Challenge

It's nearly Thanksgiving, and really busy here. I've still got to clean my house - a big job, trust me. The turkey is thawing in the fridge, but I need to shop for cranberries and the rest of the menu, and then cook it all! But I can't forget my November entry for Sew Cal Gal's  "A Handmade Christmas Challenge".


I took a pledge in January on Sew Cal Gal's web site to make handmade gifts and decorations for Christmas. Those of us who took the pledge post them then link them up and get a chance to win a prize via a random drawing at the end of the year. I missed a couple of months, but overall, I've been making something most months. November is the last regular month - December will be a wrap up. It should be fun to see all the things people have made. 

This month, I made placemats. They are destined for Meals on Wheels. A friend is collecting placemats to be delivered with the Christmas meals this year. She needed over 500 placemats (that's a lot of meals!) and I volunteered to make some. Here they are:
Placemats for Meals on Wheels
These were a lot of fun to make. I made them all different, but they all had some crazy piecing that I learned in a workshop with Jacquie Gering that my guild sponsored. She's a wonderful teacher and speaker who makes amazing Modern Quilts. Unfortunately, I didn't have any modern fabrics in reds and greens, so I just used mostly traditional styles. I wanted to put more quilting on these, but I ran out of time... what else?! They are made with regular quilting weight cotton fabric and I used wool batting, which looks a little poofy. Here's a closer look.
Crazy Pieced Center Placemat

Crazy Piecing strip bordered with pieced strips. (I ran out of red.)

Crazy Piecing strip with no borders.

Bordered Crazy Piecing bordered with solid red at left side of mat.

Don't forget to check out all the November entries at Sew Cal Gal's Handmade Christmas Challenge. Lots of great ideas - and you still have almost a month before Christmas!

Saturday, October 25, 2014

Handmade Christmas Challenge - October

This month, I have been working on my Red and White Challenge quilt. I finally finished it! Hooray! Because it has a Christmas theme, I am also using it as my October entry for Sew Cal Gal's  "A Handmade Christmas Challenge".
I took a pledge in January on Sew Cal Gal's web site to make handmade gifts and decorations for Christmas. Those of us who took the pledge post them then link them up and get a chance to win a prize via a random drawing at the end of the year. I didn't enter for the prizes, but because I really like the idea of making some nice things for Christmas, either as decorations or for giving. I usually don't think of doing something like this until Thanksgiving, and then it's too late and I'm too busy. So I decided to take the challenge! (The prizes are really pretty cool, though, so you might want to take the pledge as well. It's time to get started, if you haven't already, if you really want to make those Christmas gifts!)

Well, here it is! 
Holiday Happiness

I had so many problems with this, as you will remember from my Red and White Challenge posts. But I'm really happy with the final quilt. I plan to hang it in my house for the holiday season.

I struggled with the tension on my machine quite a bit and had to rip some quilting lines (I really dread doing this, but it was necessary). I did like the resulting quilting, though. I can't believe the freehand free motion feathers turned out so well.
Feathers at top corner.

Feathers at bottom corner.
The other problem that plagued me was that a couple of the fabrics bled when I spritzed the top with water to remove the grid markings  in the middle of the quilt. (I used a water soluble blue pen,and had prewashed the fabrics, but the color still ran.) I was able to get the pink halo stains out, though. I tried mild soap and gentle cycle to almost no effect. Then, figuring I had not much more to lose, I pretreated with  Clorox 2, and washed the quilt in Tide with cold water and the regular permanent press cycle. Voila! Stains gone! I did a real happy dance!

Don't forget to check out Sew Cal Gal's site and view both the Red and White and Handmade Christmas Challenges. Lots of great things there!

Monday, October 13, 2014

Show It! Red and White Challenge

Today I'm posting my work for Sew Cal Gal's Red and White Challenge: Show It Part 2: You made it! You designed it!.

The quilt is still in progress. Life is busy as usual, and I've had a few set backs as you'll see, but I'm determined to finish this thing. My current plan is to finish it by October 25th and enter it in the Handmade Christmas Challenge as well, since it has a Christmas theme. Here's the quilt I designed and made myself for the challenge. It's a variation on the Drunkard's Path block, inspired by a class with Pepper Cory. You can read about the design and making of the quilt here.

I've named the quilt Holiday Happiness. I'm hoping that's not just wishful thinking.

Holiday Happiness

I still have more quilting planned for this, but I'm a slow quilter and just couldn't finish in time. I plan to bind it in the red and white stripe fabric I used for the ribbons, cut on the bias. I just started quilting the border, and I have embellishments planned for the center, so please do come back to see the completed product.

I mentioned a few set backs... The tension on my machine seems to be going out about every thirty minutes. It's an old machine and I need to take it in, but I've just been too busy, so that's slowing me down. I have had to unsew some sections of quilting because of this. Then, today I wanted to remove the water soluble blue pen marks so that I could get a better picture of the quilting. I spritzed the quilt with water and... you guessed it, two of the fabrics bled. Now mind you, I had prewashed the reds with a color catcher, and I had used these same fabrics in other quilts before without a problem. (I was using up some scraps.) But today, this is what happened.
Red bled ornament :^(
I don't know if you can see it well in the picture, but there's a pink halo around the center star and around the ornament. So, once the quilt is bound, I will attempt to wash and remove the halo. I'll let you know how it goes! More to come...

But for now, I'm entering this quilt in the Sew Cal Gal's virtual show. Be sure you check out all the quilts there - there are some really great ones - and vote for your favorite by October 24!

Tuesday, September 30, 2014

Make It! Red and White Challenge

I'm back with a different challenge entry today. Sew Cal Gal issued a Red and White Quilt Challenge to inspire her followers to design and/or make a red and white quilt and show it in her virtual show. As usual for Sew Cal Gal challenges, there are some great prizes that will be awarded.  Check it out by clicking the graphic below!
The challenge is issued in 4 phases. This entry is for phase 3, the design phase. (I don't own a red and white quilt, so I wasn't able to enter phase 1, which was to show red and white quilts made before 2014.) I had entered the design phase with several designs which I did in EQ7, which was lots of fun! But I actually came up with another design when I took a workshop on Drunkard's Path variations from Pepper Cory, which was offered through my guild. It was a great workshop! Pepper is a terrific teacher, and I actually came up with my own block design which I've been exploring since. I call the block "Capture the Stars" because it looks to me like a bead with stars embedded in it. This is one of the many variations I've been playing with.

Set of four "Capture the Stars" blocks.

This one reminded me of Christmas ornaments, so I decided to make my red and white challenge quilt using this block. I think it will make a nice Christmas throw or wall hanging, don't you?

Curved piecing is not my strong suit, which is one of the reason's I was taking Pepper Cory's workshop in the first place. She did help me with my pinning (I need to pin, and with thin, small pins) and slowing down when sewing those curves. Also, I learned to use a stiletto (or my seam ripper) to pin down the fabrics at the end of the seam so that the fabric doesn't just slide out of alignment. As you can see, I've been practicing, and the curves are getting better.

Here are the fabrics (all from my stash) that I pulled to work with and I cut the blocks using Pepper's templates, which made the pieces fit together much more easily. They come in 6" or 8" sizes, and I used the 6" for this quilt. I was able to rotary cut them with these templates and a 45mm cutter, though the inside curve was easier when I used my 28mm cutter. Pepper also recommends a revolving cutting board, but I didn't have one, so I just turned my mat as needed.


Once the pieces were cut and sewn, I set them on point, added some raw edge applique "ribbons" and "bows" and then added a border. Here's the quilt put together and sandwiched for quilting:
I've got most of the seams stitched in the ditch right now, and am working on the rest of the quilting. 

This part of the challenge is for making the quilt. To see the finished quilt in all its quilted glory, you'll have to come back later in October for Sew Cal Gal's Virtual Quilt Show. I'll be entering the category for original design. Hope to see you then!  :^)

Wednesday, September 17, 2014

Handmade Christmas Challenge - September

This month, I have been working on improving my curved piecing. It has been a challenge for me - I usually avoid curves - but in poking around for tips, I ran across a tutorial for making beaded stilettos (a helpful thing to have when piecing curves.) They are my September entry for Sew Cal Gal's  "A Handmade Christmas Challenge".
I took a pledge in January on Sew Cal Gal's web site to make handmade gifts and decorations for Christmas. Those of us who took the pledge post them then link them up and get a chance to win a prize via a random drawing at the end of the year. I didn't enter for the prizes, but because I really like the idea of making some nice things for Christmas, either as decorations or for giving. I usually don't think of doing something like this until Thanksgiving, and then it's too late and I'm too busy. So I decided to take the challenge! (The prizes are really pretty cool, though, so you might want to take the pledge as well. Never to late to get started on those Christmas gifts!)

Mary's Stilettos

I first saw these stilettos and a link to the tutorial on The Quilt Show. (I do love this website and the videos and tutorials. Ricky Tims and Alex Anderson have great guests and learning the new techniques are so much fun! In any case, the tutorial is by a quilter by the name of Mary Tosch, but the actual tutorial is posted on Bonnie Hunter's Quiltville website. The link is here.

This is a really easy thing to make; useful as well as beautiful, so I just had to make some for my sewing friends. Basically, you glue the beads to a turkey lacer that is slightly modified. The tutorial directions are clear and easy to follow. I didn't have the glue she specified, but I did have glue for jewelry making (another hobby I enjoy) that would hold glass to metal. It's called Dazzle Tac..

The only other change I had to make was because I didn't have any clothes pins, at least that I could find. So instead I cut some slits in the bottom of an egg carton just big enough to hold the loops to keep the stilettos upright while the glue cured. I left them alone for 48 hours for maximum strength.

These are the final results. Pretty cool, don't you think? I hope my friends think so, too.

Don't forget to check out the other Challenge entries. There's always something inspiring at SewCalGal.

Friday, July 25, 2014

Handmade Christmas Challenge - July

This month, I have been making pin cushions for some of my sewing friends for Christmas gifts. They are my July entry for Sew Cal Gal's  "A Handmade Christmas Challenge".
I took a pledge in January on Sew Cal Gal's web site to make handmade gifts and decorations for Christmas. Those of us who took the pledge post them then link them up and get a chance to win a prize via a random drawing at the end of the year. I didn't enter for the prizes, but because I really like the idea of making some nice things for Christmas, either as decorations or for giving. I usually don't think of doing something like this until Thanksgiving, and then it's too late and I'm too busy. So I decided to take the challenge! (The prizes are really pretty cool, though, so you might want to take the pledge as well. Never to late to get started on those Christmas gifts!)

The pin cushions I made this month are these adorable birds. The pattern is a free download from Sharon Holland Designs. Check out her blog - she has some really cute designs that could make great gifts.
Little Birdie Pincushion by Sharon Holland Designs
As you can see, I made eight of these using small scraps of fabric. The pattern calls for stuffing them with fiberfill with a base weighted by rice or pellets, but instead, I filled the head areas (and the wings and tails) with fiberfill, then filled the main body with finely ground walnut shells (bought at the pet shop.) That gave them weight and a pleasant bean bag feel. I did try to fill one so that the head and body was completely filled with the walnut shells, but that meant the head sort of lost its shape and the bird looked too fat to me.

Seven of these are destined for gifting, but I like them so much, I'm keeping the red birdie as a Christmas ornament for my sewing room. I like to have something festive in every room in the house at Christmas - it's my favorite time of year.

Do check out the other July entries for Sew Cal Gal's Handmade Christmas Challenge. There are some cute gifts and several lovely Christmas quilts this month. Take a look; you may be inspired to make your own Handmade Christmas!


Wednesday, June 25, 2014

Handmade Christmas Challenge - June Entry

It's the 25th of the month and today I'm posting my June entry for Sew Cal Gal's  "A Handmade Christmas Challenge".
Each month Sew Cal Gal encourages her followers to post things we have made either for our own homes for Christmas, or to use as Christmas gifts. We link them up and get a chance to win a prize via a random drawing. I didn't enter for the prizes, but because I really like the idea of making some nice things for Christmas, either as decorations or for giving. I usually don't think of doing something like this until Thanksgiving, and then it's too late and I'm too busy. So I decided to take the challenge!

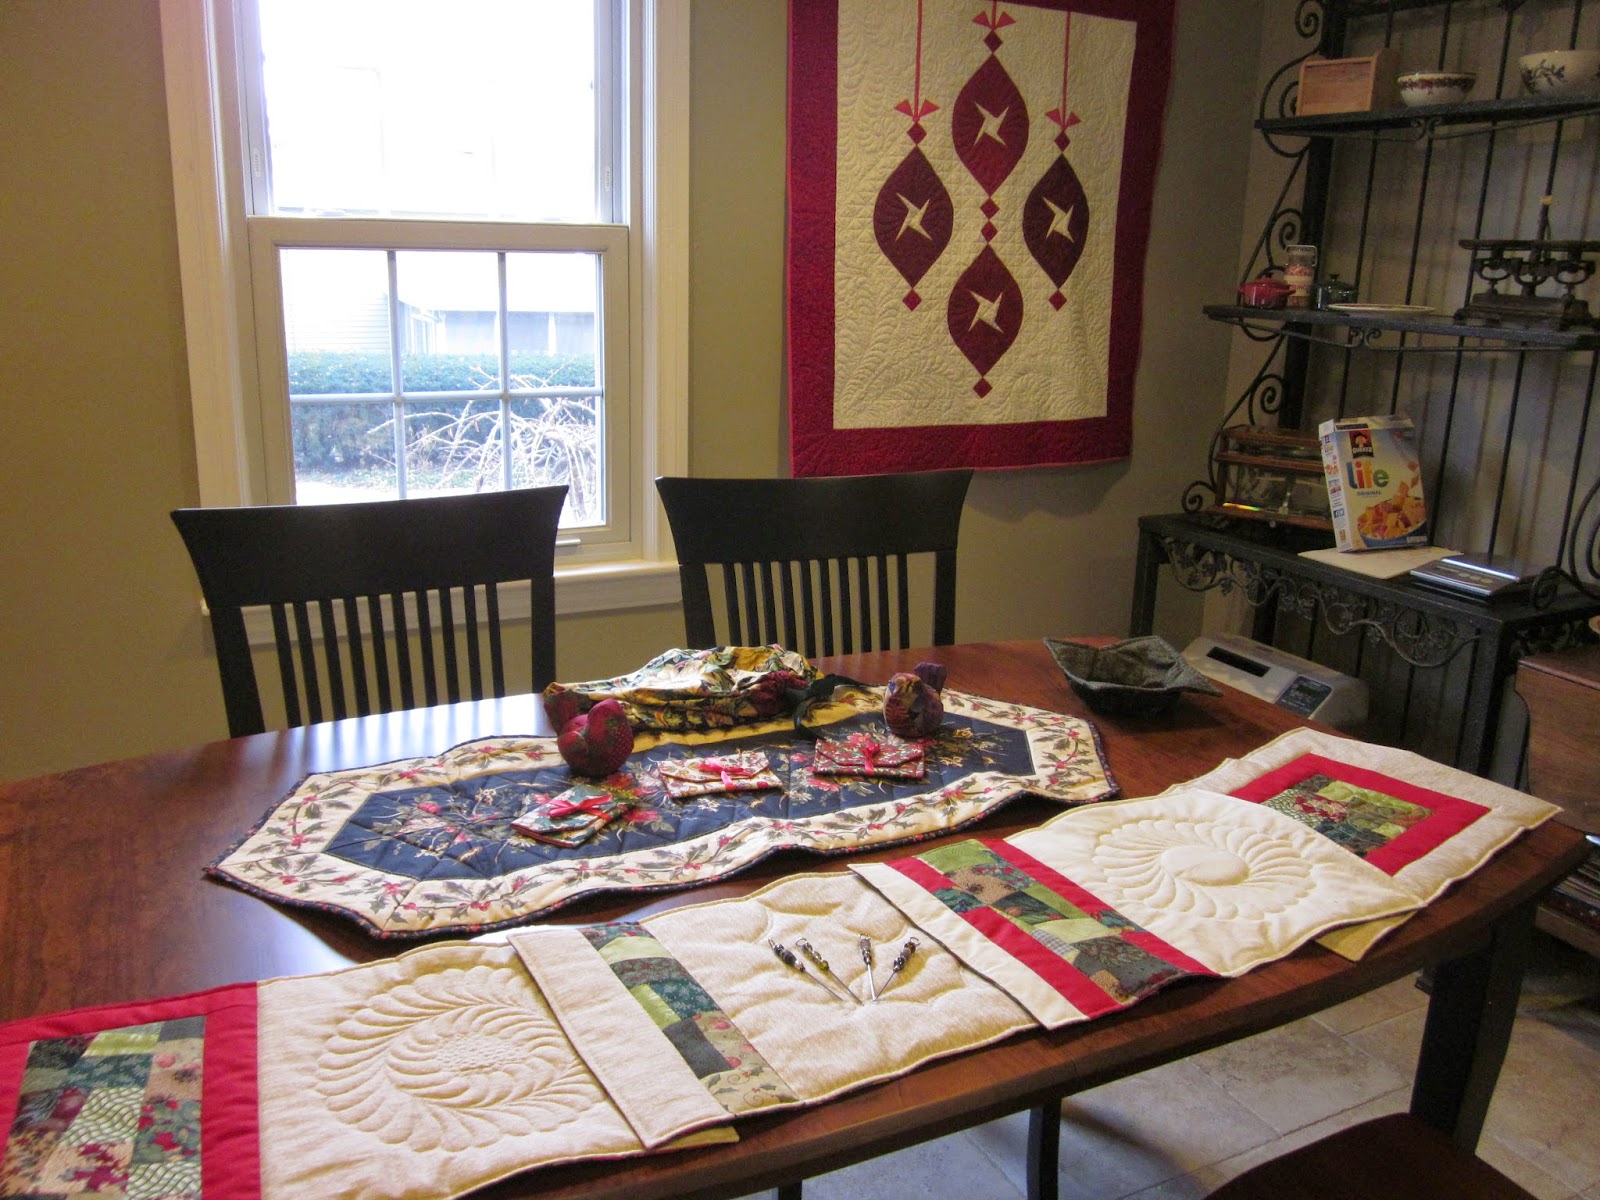
This month, with time short as usual, I decided to find some simple pattern that would be useful. After some searching, I found a free pattern on Craftsy that was just perfect. It's the "Mini Scrap Wallet" by the Sewing Loft. This pattern is super easy and would be great of "made" fabric using scraps from the scrap bin. I wanted to use Christmas fabric, and since I really didn't have any scraps, I just made the wallets from two fabrics, one for the outside and another for the lining. I think they turned out well.

Mini Scrap Wallets pattern by The Sewing Loft
available free from Craftsy.


Unfortunately, I didn't have any Velcro or snaps, so I just tacked a piece of ribbon to the back. It's a bit shorter than I would like, though, so I may change that later. These are the perfect size to hold a gift card, or maybe a piece of jewelry or some other small gift. I think my friends and family will love them! All three took less than 2 hours, start to finish.

I love Craftsy classes, but this is the first pattern I've tried from one of their independent designers. There are a fair number of free patterns - most fairly simple - and some really nice paid patterns as well as fabric and notions. If you haven't checked them out yet, I would recommend you do; you can click the link above. They even have some free mini-classes you can try as well!

Speaking of checking things out, have you been to Sew Cal Gal's site yet? It has wonderful quilty and crafty info. Don't forget to check out the Handmade Christmas Challenge. There are some lovely things posted there. Maybe you'll be inspired to enter and even win a prize!

Have a great day and keep sewing!

Sunday, May 25, 2014

May Entry - Handmade Christmas Challenge

I'm back! Posting my May entry for Sew Cal Gal's  "A Handmade Christmas Challenge".
Each month Sew Cal Gal encourages her followers to post things we have made either for our own homes for Christmas, or to use as Christmas gifts. We link them up and get a chance to win a prize via a random drawing. I didn't enter for the prizes, but because I really like the idea of making some nice things for Christmas, either as decorations or for giving. I usually don't think of doing something like this until Thanksgiving, and then it's too late and I'm too busy. This is a great chance to to get ahead of the game.

Unfortunately, I missed the March and April entry dates. Just too many things going on here. I really didn't want to miss May as well. So I started last month right after I had missed the date. And I still didn't finish until today.

This month, I made a table runner using a 60 degree ruler and a border print.


It seemed really easy, but I had some trouble getting the seams lined up. When you cut 60 degree triangles, you end up with a lot of bias edges, which stretch pretty easily. I ended up with a somewhat wavy border, even though everything was flat before quilting. I think there were two reasons - the quilting is not uniform across the entire piece (I quilted the inside area, but not the outside. Also, I think I probably stretched things a bit when I bound the edge. In any case, I plan to use it this Christmas on my kitchen table.

Check out Sew Cal Gal's Handmade Christmas Challenge and see all the wonderful things others have done. Or start a project to post next month and get a head start on Christmas!

Friday, February 28, 2014

Design It! Red and White Challenge Entry

I'm back with an entry for a different challenge today. Sew Cal Gal has issued a Red and White Quilt Challenge to inspire her followers to design and/or make a red and white quilt and show it in her virtual show. As usual for Sew Cal Gal challenges, there are some great prizes that will be awarded. In this phase you even have a chance to win fabric for your design and maybe even work with Island Batik to have your pattern offered as a free pattern on their website! Check it out by clicking the graphic below!


The challenge is issued in 4 phases. This entry is for phase 2, the design phase. (I don't own a red and white quilt, so I wasn't able to enter phase 1, which was to show red and white quilts made before 2014.)

This challenge started with a blog hop with tutorials on how to use EQ7 to do some quilt design. I have EQ7, but hadn't used it much except for recoloring or rearranging blocks (think electronic design wall), and hadn't really drawn blocks from scratch. I followed the tutorials and got hooked! I've designed so many quilts in the last couple of weeks, it's crazy! The program is just so much fun to play with! I drew all these blocks from scratch for practice, even though the traditional blocks are probably in the program. It was more fun that way.


I'm choosing my favorite four designs to share here. The program was so much fun, I actually saved 31 different blocks and 22 quilts in my sketchbook for this project!  I started my design exploration by playing with straight line components that give the illusion of a curve when put together. My first two designs are fairly traditional. I'm printing the name I gave the quilt pattern, the finished size, and the yardage requirements which EQ7 provides me as requested by Sew Cal Gal.

***Note on yardage requirements: because I was learning and didn't know how this would show up, I have several different red and white fabrics in each quilt. It is very difficult to differentiate them in the blog, so I would have to go back to the EQ7 file to make sure which is which, or if I wanted just one white fabric and one red fabric, I could total the various yardages and buy that.

Quilt #1
Starry Scarlet Netting
73'x73"

This is a combination of a star block and a snowball block. I love the illusion of a curve here with the red stars and the large white diamond shapes provide plenty of open space for some fancy quilting.

Quilt #2
Crimson Constellation
73"x73"

In this quilt, I replaced the snowball block with a monkey wrench block with a divided center. Again, this has a nice suggestion of curves, though it's made up of straight line piecing. In my mind, I see 4 pointed white stars with red centers in a white circle connected by the red 8 pointed stars with white centers. Not so much room for quilting, but nice, I think.


The next two entries are a bit less traditional. I found some of the blocks by applying some of the "Serendipity" functions to my blocks, then adding or removing some seam lines and rotating blocks as needed. All really easy to do in EQ7, even for a beginner at the program like me. The results were sometimes very complicated. These were two of my favorites of these type of quilts.

Quilt #3
Scarlet Starburst
73"x73"

I love this quilt, and I think it would be fun to paper piece.. It looks like an explosion of stars! It seems much too complicated to rotary cut or use templates and piece conventionally. Luckily, EQ7 allows for paper piecing and I can print the necessary foundations directly from the program! I'm printing the yardage requirements the program gave me, but I would probably buy more fabric than this - just to be sure I have enough to cover the different pieces. Paper piecing does seem to use more fabric - all that trimming.  Again, I like that there are some nice open areas for fancy FMQ here.

Quilt #4
Crimson Crosses
73"x73"

This pattern has the look of a royal insignia or jewel to me. There are nice open areas for FMQ and a strong graphic statement that I see as crosses, but others might see as flowers.

This was a really fun and exciting challenge, and I don't really feel like I'm finished, but the more I play, the harder it gets to choose favorites... so the longer the post becomes. I decided to post and link up now, but the challenge doesn't end until March 23rd, so why not give this one a try? At least check out the other entries.They are great! Enjoy!